

Why Insurance Claims Feel Overwhelming
After a major hail event, thousands of homeowners in the same area file claims simultaneously. Insurance companies are flooded with requests, adjusters are overbooked, and the process can stretch from weeks into months. Meanwhile, your roof is still damaged and your home is still at risk.
The good news is that the claims process follows a predictable sequence, and knowing what to expect at each stage gives you a significant advantage.
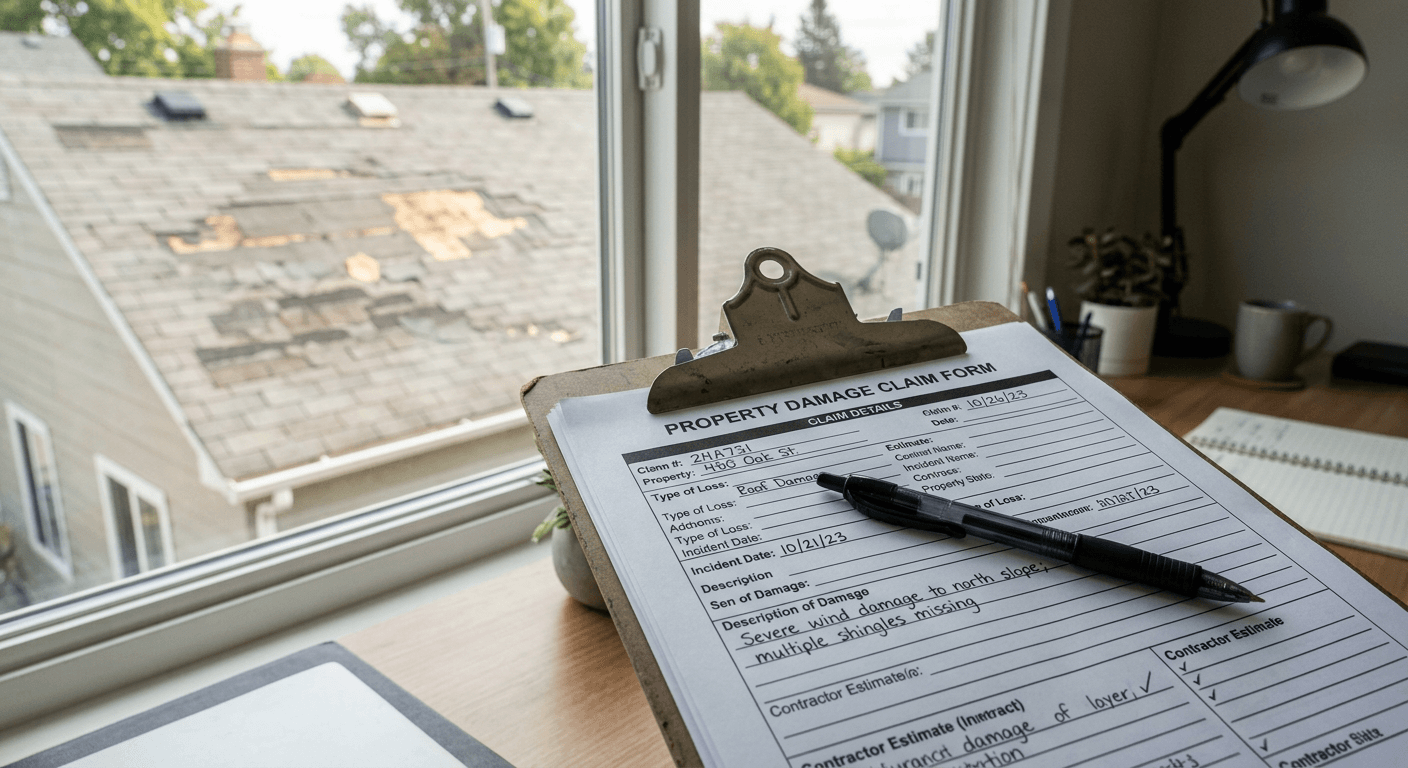
Step 1: Document the Damage Immediately
Time is critical. Most insurance policies require that you report damage within a specific window — often 60 to 90 days — or risk having your claim denied.
What to document:
- Photos of any visible damage from the ground (don't climb on the roof)
- Photos of collateral damage: dented gutters, damaged window screens, pockmarked siding
- Date and approximate time of the storm
- Any temporary repairs you perform (tarping, etc.) along with receipts
Important: Do not perform permanent repairs before your adjuster inspects the property. Temporary protective measures are fine and expected — but replacing shingles or other materials before the inspection can complicate or void your claim.
Step 2: File Your Claim Promptly
Call your insurance company's claims line as soon as possible. You'll receive a claim number and be assigned an adjuster. Keep a written log of every phone call, including the representative's name, date, time, and what was discussed.
Information your carrier will need:
- Policy number
- Date of loss (the storm date)
- Description of damage observed
- Whether the property is occupied
- Contact information for your contractor (if you've already engaged one)
Step 3: Get a Professional Roof Inspection
Before the insurance adjuster arrives, have an independent roofing contractor inspect the damage and prepare a detailed scope report. This isn't about inflating the claim — it's about ensuring that nothing is missed.
A qualified contractor will identify damage that's invisible from ground level: bruised shingles, compromised underlayment, damaged pipe boots, and cracked flashing. Their report serves as a critical counterpoint to the adjuster's assessment.
Free Roof Inspection — No Obligation
Culture Construction is GAF Master Elite certified and headquartered in Elmhurst, IL. Same-week inspections across DuPage, Cook, and Will County.
Step 4: Be Present for the Adjuster's Inspection
When the insurance adjuster visits your property, be there. If possible, have your contractor present as well. This allows real-time discussion about any discrepancies between the adjuster's findings and your contractor's scope.
Key things to watch for:
- Ensure the adjuster inspects every slope of the roof, not just the street-facing side
- Confirm they check all metal components (vents, flashing, gutters)
- Ask them to document test squares (typically 10×10 foot areas) for hail impact counts
Step 5: Review the Adjuster's Report Carefully
The adjuster will submit a report to your insurance company, which produces a "scope of loss" document. This is the detailed line-item breakdown of what the carrier is willing to pay for. Review it carefully.
Common items that get missed or undervalued:
- Ridge cap replacement
- Ice and water shield underlayment
- Drip edge and starter strip
- Waste factor on materials
- Code-required upgrades (ventilation, etc.)
If items are missing or undervalued, your contractor can prepare a supplement request with documentation to support the additional scope.
Step 6: Understand Your Payout
Insurance payouts typically come in two checks:
- Actual Cash Value (ACV): The depreciated value of the damaged materials, minus your deductible. This is paid upfront.
- Recoverable Depreciation: The remaining value, paid after repairs are completed and documented. Your contractor submits a "certificate of completion" to trigger this payment.
How Culture Construction Helps
We handle claims-related projects every week. Our team prepares insurance-ready documentation, attends adjuster inspections, and files supplement requests when the initial scope falls short. You focus on your family — we handle the process.
Contact us for a free storm damage inspection and claims consultation.